Monday, June 26, 2023

Zucchini Fritters - ****

Very tasty.  After frying them, we air-fried them at 425 for 10 minutes, which was good.  


  • 2 cups zucchini grated
  • 1/2 onion, diced, lightly sauteed
  • 1 tsp sea salt 
  • 2 large eggs
  • 3/4 cup vegan parmesan 
  • 1 Tbsp coconut flour
  • 1 tsp garlic powder
  • 1 tsp onion powder
  • 1 tsp smoked paprika
  • 1-2 Tbsp avocado oil

  • Grate the zucchini into a colander, toss with the sea salt and allow to drain for 10 minutes.
  • Wrap zucchini in cheesecloth and gently squeeze over sink to remove excess water.
  • In a mixing bowl, combine zucchini, eggs, vegan parmesan, coconut flour, garlic powder, onion powder, and smoked paprika. Let chill in fridge for 10-15 minutes.
  • Heat oil in large skillet. Use a cookie scoop to add 1.5 Tbsp batter to the hot skillet. Fry each side until browned, flattening with spatula as you go.
  • When both sides are nicely browned, about 2-3 minutes per side, remove from pan and drain fritters on paper towels.


Tips For Crispy Fritters

It's important to follow these steps in order to make crispy zucchini patties:

  • Remove the excess moisture. Salting the grated zucchini will help pull out the water. Squeezing the zucchini after allowing it to sit in the colander will remove any excess liquid that didn't drain out.
  • Include an absorbent ingredient Coconut flour is used in the fritter batter because it's very absorbent. That way, any additional water released from the vegetable during cooking will be absorbed. Psyllium flour, flax meal, or chia seeds would also work.
  • Use a hot non-stick pan. The oil needs to be very hot to sear the outside of the patties so be sure to use one with a high smoke point. But it's also important to have a non-stick surface so those crispy outsides to get stuck in the pan.
  • Press the fritters as they cook. Adding pressure to the bottom of the patty as it cooks will ensure the surface gets a nice brown sear.
  • Drain on paper towels after frying. If the oil settles on the cooked fritters, they can get soggy. That's why the patties should be placed on absorbent paper towels to soak up any excess oil after cooking.


https://lowcarbyum.com/coconut-flour-zucchini-fritters-gluten-free/

Baked Zucchini Rounds

Good taste but very soggy.  Baked on parchment paper.  Will keep trying. 


INGREDIENTS

  •  2 medium zucchini — sliced into rounds, 1/8" thick
  •  3 Tbsp olive oil
  •  1/3 cup vegan parmesan cheese, divided
  •  1/2 tsp garlic powder
  •  1/4 tsp smoked paprika
  •  1/4 tsp Celtic sea salt
  •  

INSTRUCTIONS

  1. Preheat oven to 375 F.
  2. Spray a rimmed baking sheet (you may need 2 baking sheets (I use olive oil spray).
  3. In a small bowl combine olive oil, 1/4 cup vegan parmesan, garlic powder, smoked paprika, and sea salt. Add zucchini and toss to coat.
  4. Line zucchini on baking sheet and sprinkle remaining parmesan on top.
  5. Bake for 15-17 minutes, until the top is golden.
https://cookinglsl.com/baked-zucchini-chips/#wprm-recipe-container-39343

Zucchini Tots

 Good flavor.  Stuck to a regular muffin tin coated with avocado oil.  Will try a silicone pan.


Ingredients

  • 2 cups shredded zucchini 
  • 1 tsp fine sea salt
  • 1 Tbsp coconut flour
  • 2 large eggs
  • 4 ounces nutritional yeast 
  • 1 tsp onion powder
  • 1 tsp smoked paprika

Instructions

  • Preheat the oven to 400 degrees. Spray a 24-cup mini-muffin pan with cooking spray.
  • Place the shredded zucchini in a medium-sized or large bowl and toss with the salt. Let sit for 10 to 15 minutes. Squeeze out any moisture and discard the liquid.
  • Sprinkle the coconut flour onto the zucchini and toss well to coat. Add the eggs, nutritional yeast, onion powder, and smoked paprika, and mix well to combine.
  • Fill each muffin cup with 1 ½ tablespoons of the zucchini mixture. Bake for 15 minutes, or until golden brown. Run a knife around the tots to loosen as soon as you get them out of the oven. Let cool for a minute to allow them to set up, then remove them from the muffin pan.

Notes

Recipe from The Ketogenic Cookbook, copyright 2015. Reprinted with permission from the author.https://www.southernkissed.com/zucchini-tots-recipe/

Saturday, June 24, 2023

Low Histamine Roasted Garlic “Hummus”


Low Histamine Roasted Garlic “Hummus” (also low lectin, low oxalate)

 I always make a triple batch of this hummus. This leaves extra for the white sauce base I use for my Cassava Crust Pizza. I’ll share that recipe with you soon – so stay tuned!

Here’s the low histamine hummus recipe for you.

 Makes about 3 cups

 Ingredients

  • 1 head of cauliflower
  • 1 head roasted garlic (see recipe below) or 1/2 clove of raw garlic, chopped
  • ½ cup extra virgin olive oil
  • Juice of 1/2 lemon (you can sub Camu Camu Powder* powder for the tartness if sensitive to lemons)
  • 1/2 – 3/4 tsp unrefined sea salt
  • 2 tablespoons water (only needed if using food processor or regular blender)

Optional: Flat leaf parsley or basil and extra virgin olive oil to garnish
Can also garnish with toasted sesame seeds

 Directions

  1. Roast garlic or remove previously roasted garlic from freezer (see below).
  2. Steam cauliflower until soft.
  3. Put garlic, cauliflower, olive oil, lemon juice, water, and sea salt into high speed blender (like a VitaMix or Blendtec) or a food processor.
  4. Blend on high in a Blendtec Blender* or Vitamix blender* or similar for a couple minutes until hummus is smooth. Or you can process in a food processor.
  5. Garnish with parsley and extra virgin olive oil.
  6. You can serve with:
    Carrot and celery sticks
    Flax crackers

Histamine-Busting Roasted Garlic

Here is my super easy, mass production method for roasted garlic. This takes very little time. And you’ll have lots of roasted garlic for recipes!

Mast Cell 360 Low Histamine Roasted Garlic

Ingredients

Baking Utensils

2 – 12 cup muffin tins

Spare ice cube trays

Directions

  1. Preheat oven to 400 degrees.
  2. Cut the top off each head of garlic so you can see the top of the cloves.
  3. Place each head of garlic inside a cup of one muffin tin.
  4. Rub the top of each head of garlic with ghee or coconut oil so it doesn’t dry out.
  5. Cover the muffin tin with the second muffin tin.
  6. Bake for 30 minutes until the garlic cloves are mushy and roasted.
  7. Let cool.
  8. Squeeze the garlic cloves out of the heads.
  9. You can use the garlic immediately in a recipe.
  10. To store leftovers, place 4-5 cloves of garlic in each section of an ice cube tray. Repeat until you have used all the garlic.
  11. Cover cloves with olive oil and freeze until solid.
  12. Pop the cubes of frozen roasted garlic out of the ice cube trays and store in a container in the freezer.
  13. Pull out whenever you need to add roasted garlic to a recipe.

Cauliflower Hummus - Phase 1


Tuesday, June 20, 2023

Chicken and Lettuce Wrap - to try

 Chicken and Lettuce Wrap

GFCF
by Ling

This is an adaption of Vietnamese and Chinese recipe!

Ingredients:
  • 8oz Minced chicken (Trace)
  • 1/2cup Water Chestnut - chopped (0.8mg)
  • 1/4t Fresh Ginger (0.5mg)
  • 1T Pacific Organic Chicken Broth (0.3mg)
  • 500gm Iceburg Lettuce (6.5mg)
  • 2 sprigs of Fresh Cilantro (0.4mg)
  • 1T Fresh Basil (2.9mg)
  • 10 Fresh Peppermint leaves (0.5mg)
  • 1/4 cup Pumpkin Seed (3.2mg)
  • 2T Olive oil (1.8mg)
  • Salt and Pepper to taste
  • 1T Fresh Lemon Juice (0.1mg)
Directions:
  1. Marinate minced chicken with ginger, salt and pepper.
  2. Stir fry the minced chicken with olive oil until almost cooked.
  3. Add in water chestnuta and chicken broth.
  4. Stir fry for a few more minutes.
  5. Wash the lettuce and pat dry.
  6. Chopped cilantro, basil, peppermint and pumpkin seeds, and put in separate small bowls.
  7. Place one lettuce leaf on plate, place some fried minced chicken and water chestnuts on top.
  8. Sprinkle with cilantro, basil, peppermint and pumpkin seeds.
  9. Splash with a few drops of lemon juice.
  10. Wrap the lettuce and eat!
Oxalate for per lettuce wrap is very low and it tastes good!


http://www.lowoxalate.info/recipes.html

Peppermint Tea Latte *****


To make your own peppermint tea:

  • Bring 2 cups water to a boil.
  • Turn off heat and add a handful (about 15 whole leaves) of torn peppermint leaves to the water.
  • Cover and steep for 5 minutes; strain and return to the pan.
  • Add coconut milk to taste.  Using a frother, froth until 
  • Add 100% pure monk fruit to taste (I used two 1/16th tsp); froth until mixed.

Because peppermint tea is naturally free of caffeine, you can drink it at any time of day.

Enjoy it as a post-meal treat to aid digestion, in the afternoon to boost your energy levels, or before bed to help you relax.

Monday, June 12, 2023

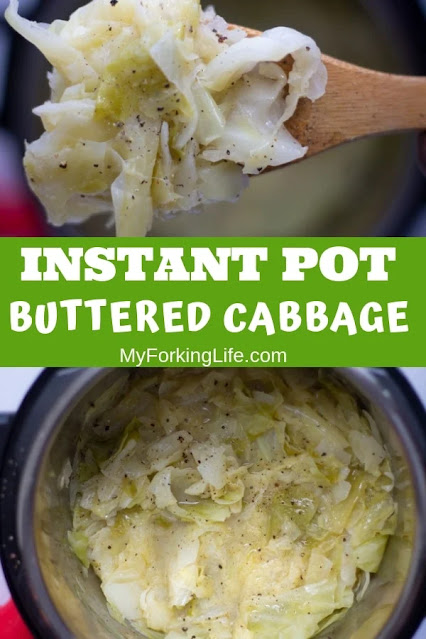
Instant Pot Buttered Cabbage - ****


This buttered Instant Pot Cabbage is easy and delicious and can be made right in your Instant Pot Pressure Cooker. It’s one of our favorite ways to eat cabbage.

 Prep Time10minutes 
 Cook Time6minutes 
 Time to come to pressure15minutes 
 Total Time31minutes 
 Servings        4

  • Ghee or avocado oil
  • 1 onion, chopped
  • Garlic powder to taste
  • 1 head green or Napa cabbage, chopped into 1 inch pieces
  • 1 cup broth
  • 2 tsp oregano
  • Celtic sea salt to taste

  • Set Instant Pot to saute and add ghee or avocado oil. Add onion and garlic powder, and saute, stirring often, until tender. 
  • Turn off the saute function.  Add cabbage, vegetable broth, and oregano.
  • Cook on high pressure for 6 minutes. Use quick release. 
  • Stir cabbage. Season with sea salt and serve with additional ghee.

Adapted from https://www.myforkinglife.com/instant-pot-cabbage/

Ginger Hakurei Turnips *****


Ingredients
  

  • 1-2 tsp olive oil
  • 1 clove garlic, minced
  • 1 tsp freshly ginger grated 
  • 1 bunch Hakurei turnips and greens, washed, chopped into 1" pieces
  • 1-2 Tbsp coconut aminos

INSTRUCTIONS
 

  • In a saute pan, heat oil over medium heat
  • Add garlic and ginger, saute for 1-2 minutes
  • Add turnips and cook until slightly brown for about 3-4 minutes
  • Add greens and coconut aminos, and cook 1-2 minutes more, until greens begin to wilt

https://www.nourishedsimply.com/ginger-soy-hakurei-turnips/#recipe